Key takeaways
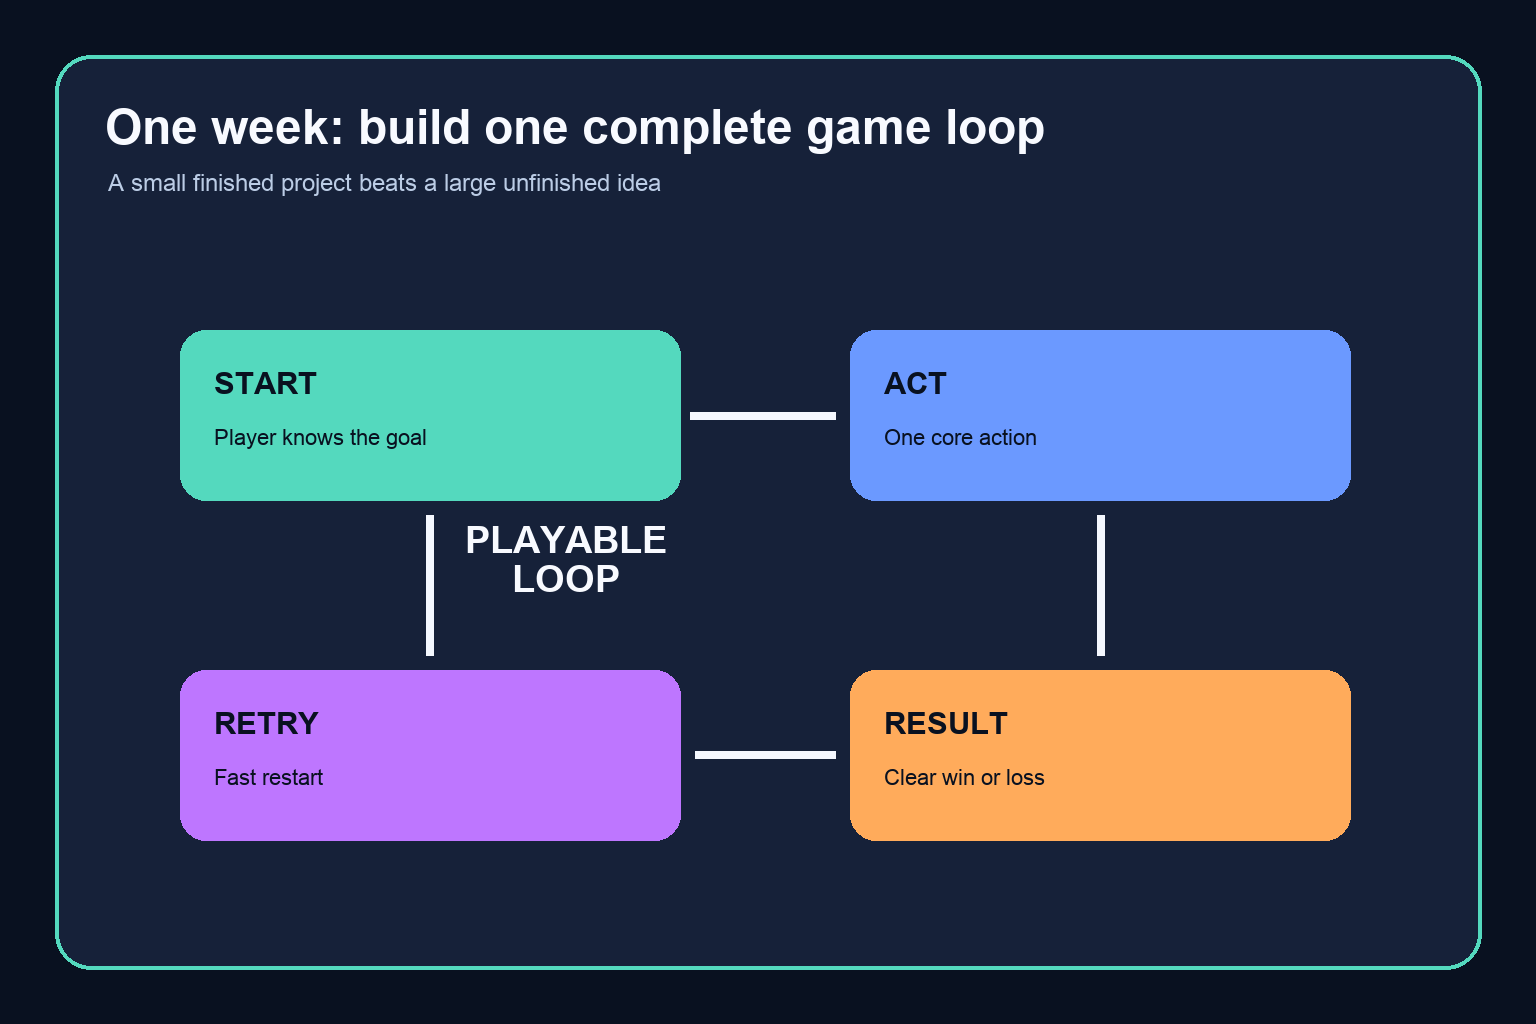
- If you have one week, the most realistic way to finish a game for a school project is to make one tiny game loop that can be started, played, lost or won, and restarted. Choose one player action, one obstacle, and one clear ending. Treat every second level, extra character, online feature, procedural system, or elaborate art pass as optional until that loop works.
- That is not a promise that every project can be finished in seven days. It is a way to give yourself the best chance of handing in something coherent. Your grade may value design process, technical choices, reflection, or presentation as well as the build, so check the rubric first. Then reduce the game until its core can be tested by another person on day three, not just imagined in your notes.
- ## The realistic target: a complete small experience
- A week is enough time for a small, finished experience if the requirements and your existing skills line up. It is usually not enough time to learn a new engine, build custom art, create several levels, write a long story, add multiplayer, and polish every edge at once. The safest target is a vertical slice: one short playable situation that demonstrates your central idea from beginning to end.
- For example, a realistic project might be a top-down maze where the player collects three batteries before a timer ends; a one-button rhythm challenge with a score target; a dialogue game with one meaningful choice and two endings; or a physics puzzle with three carefully tested puzzles using the same mechanic. Each has a goal, input, feedback, failure or completion state, and restart path.
- Write the game in one sentence: “The player uses this action to overcome this obstacle and reach this end condition.” If you need several sentences, you probably have more than one game in your plan. Pick the strongest sentence and postpone the rest.
If you have one week, the most realistic way to finish a game for a school project is to make one tiny game loop that can be started, played, lost or won, and restarted. Choose one player action, one obstacle, and one clear ending. Treat every second level, extra character, online feature, procedural system, or elaborate art pass as optional until that loop works.
That is not a promise that every project can be finished in seven days. It is a way to give yourself the best chance of handing in something coherent. Your grade may value design process, technical choices, reflection, or presentation as well as the build, so check the rubric first. Then reduce the game until its core can be tested by another person on day three, not just imagined in your notes.
The realistic target: a complete small experience
A week is enough time for a small, finished experience if the requirements and your existing skills line up. It is usually not enough time to learn a new engine, build custom art, create several levels, write a long story, add multiplayer, and polish every edge at once. The safest target is a vertical slice: one short playable situation that demonstrates your central idea from beginning to end.
For example, a realistic project might be a top-down maze where the player collects three batteries before a timer ends; a one-button rhythm challenge with a score target; a dialogue game with one meaningful choice and two endings; or a physics puzzle with three carefully tested puzzles using the same mechanic. Each has a goal, input, feedback, failure or completion state, and restart path.
Write the game in one sentence: “The player uses this action to overcome this obstacle and reach this end condition.” If you need several sentences, you probably have more than one game in your plan. Pick the strongest sentence and postpone the rest.
Make a scope ladder before you open the editor
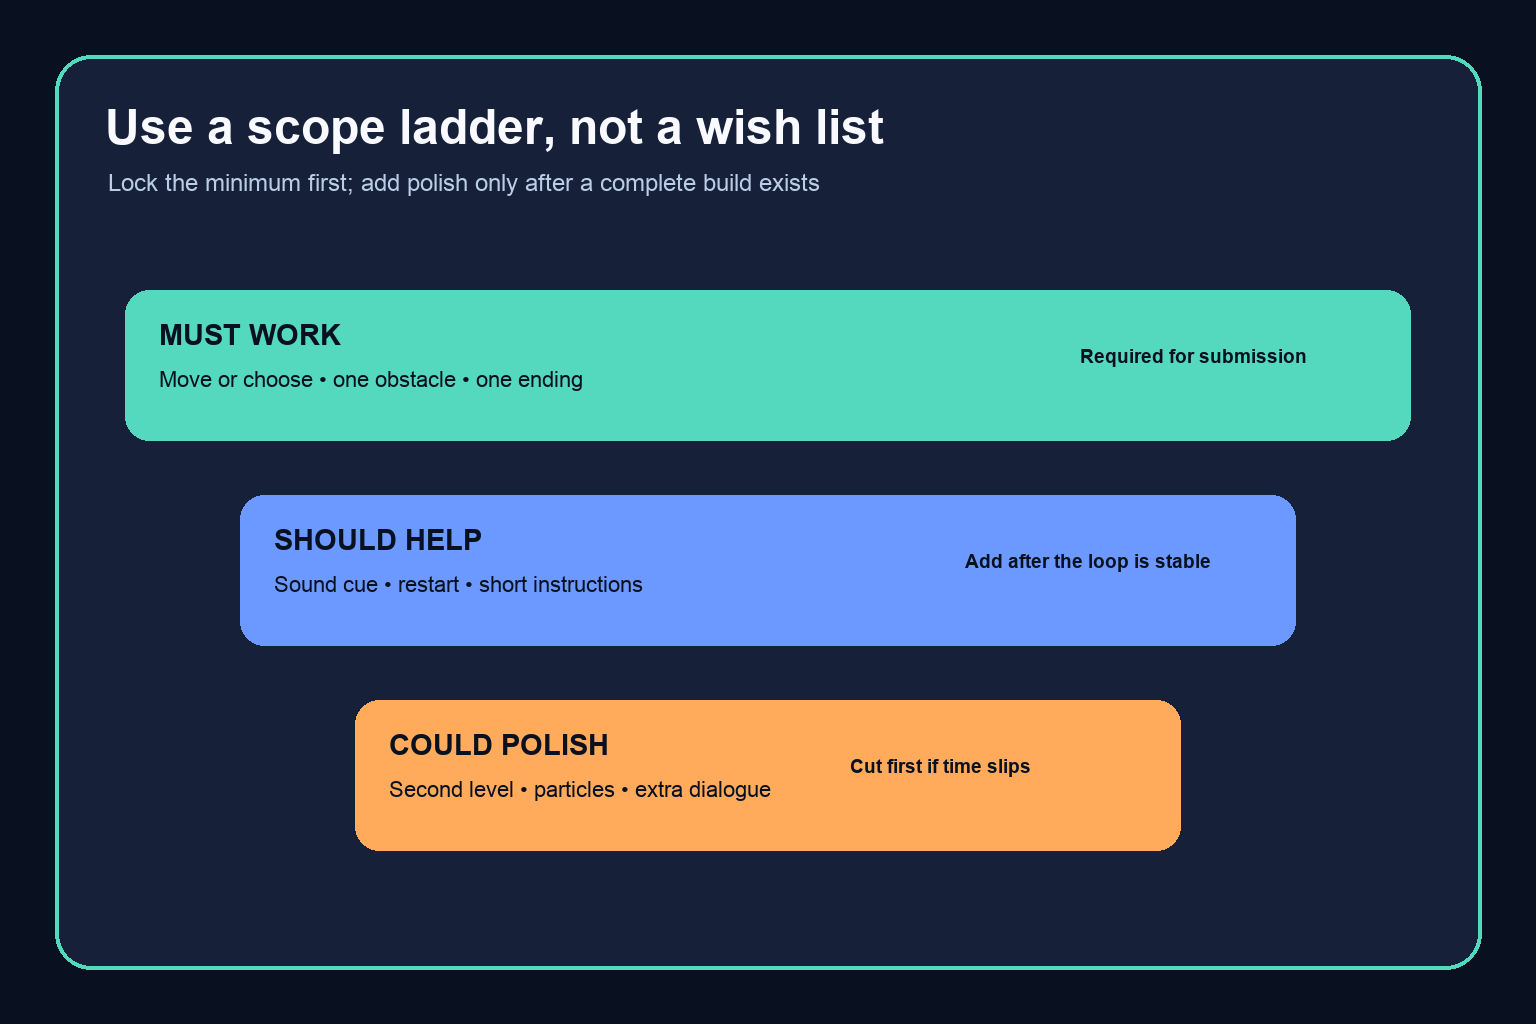
Your first deliverable should be a short scope ladder, not a feature list. Put only the parts required for a playable submission in the first tier. Put useful but nonessential improvements in the second. Put attractive extras in the final tier, where they can be removed without breaking the game.
A simple platformer illustrates the difference. The must-work tier could be movement, one jump, one hazard, a finish flag, and a restart. The helpful tier could include sound, a title screen, and two extra hazards. The polish tier could include multiple worlds, collectibles, boss fights, particle effects, and custom menus. If movement and restart are unreliable, work on neither collectibles nor menus.
The hard rule is this: when a task takes longer than expected, cut from the bottom tier rather than moving the deadline. Scope reduction is not failure; it is production control. Keep a “later ideas” note so good ideas are saved without becoming today’s work.
Choose the tool you can already use
For a one-week school project, familiarity matters more than theoretical power. Use an engine, framework, or no-code tool you have already opened successfully. Reuse a starter template when the rubric allows it. If you are new to game development, choose a format with few systems: a browser game, a simple 2D scene, a choice-based story, or a compact puzzle.
Avoid switching tools after day one unless the current setup cannot produce your minimum loop. Learning a new interface feels productive, but it can consume the time reserved for debugging and testing. Likewise, choose placeholder shapes, free assets whose licenses you understand, or a deliberately minimal visual style rather than waiting for perfect art.
Before committing, answer four practical questions: Can you run the project on the machine that will be used for testing? Can you save and back it up? Can a classmate understand the input without an explanation? Can you export or share the required format? A “yes” to these questions is more valuable than an ambitious technology choice.
Build the loop in the right order
Start with ugly functionality. First make the player’s input do something. Next make that action interact with one obstacle, target, or choice. Then add a visible result. Finally add a win or loss condition and a quick restart. Test each piece before adding the next.
Suppose you are making a stealth game. Do not begin with guard art, a story intro, or five rooms. Begin with a rectangle that moves, a detection zone, a goal zone, and text that says “caught” or “escaped.” Once that works, you can replace rectangles with simple visuals. The game idea is proven by the decision and consequence, not by the first asset pass.
Keep a tiny test list beside the project: start the game, perform the core action, trigger failure, restart, reach success, and repeat. Run the whole list whenever you make a change. A small repeatable test catches broken links, missing scenes, and state errors while they are still cheap.
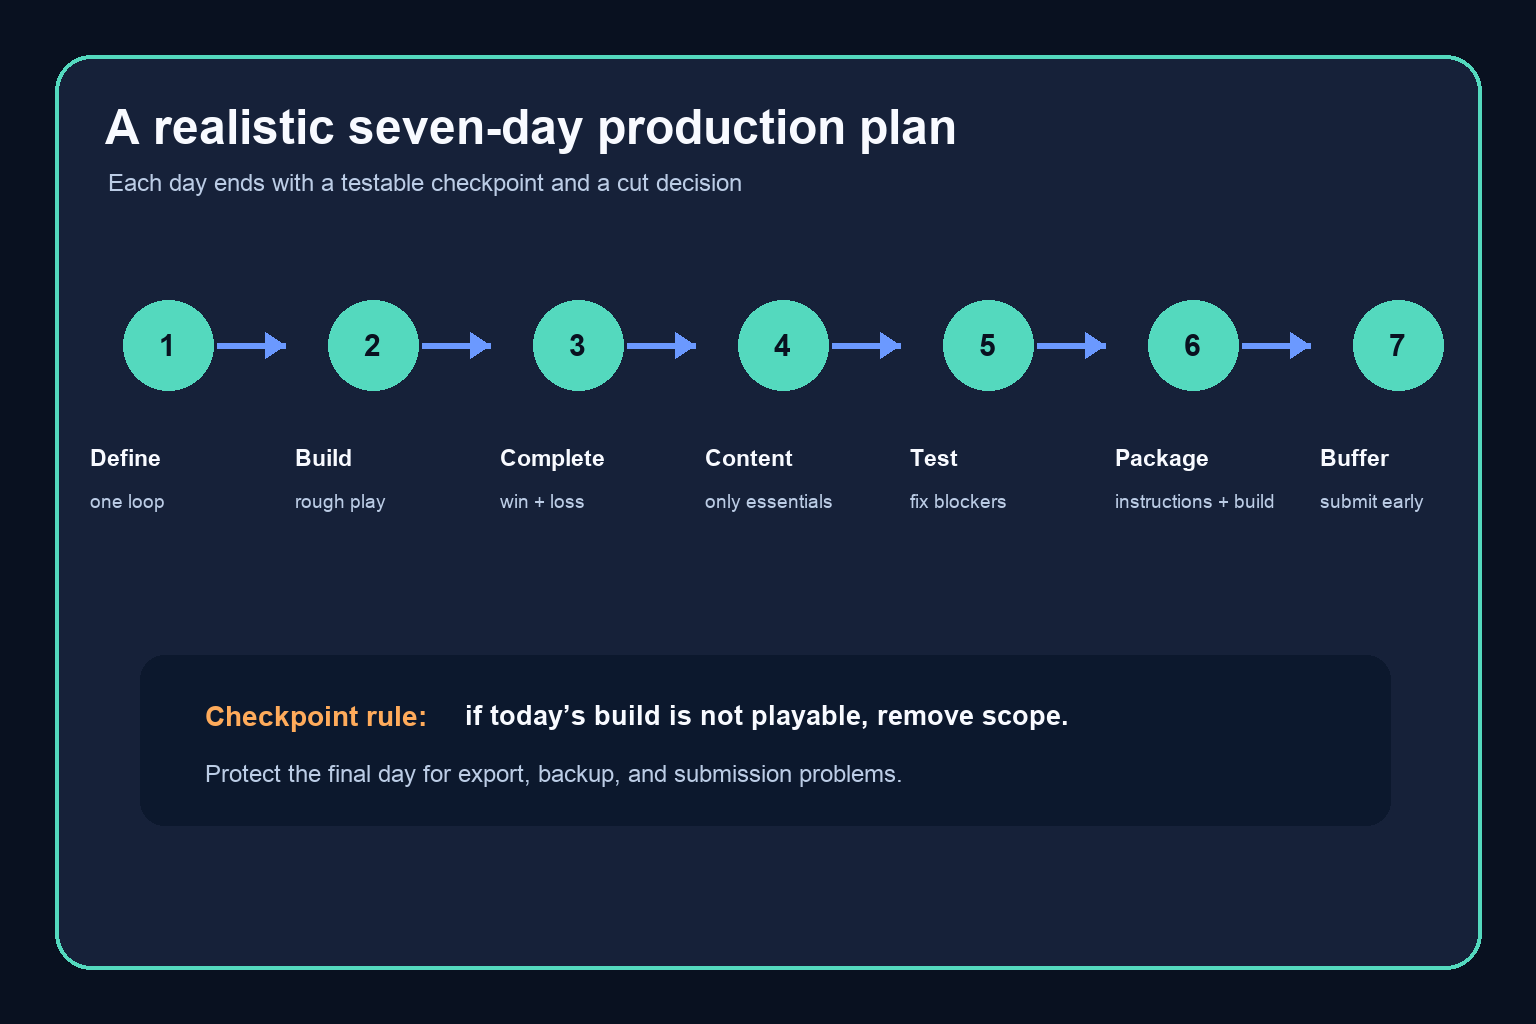
Use a seven-day schedule with checkpoints
Plan daily checkpoints, not vague work sessions. If a checkpoint is missed, reduce scope that day. Do not borrow the final submission buffer for a feature that is merely nice to have.
Day 1: define and prove the input
Read the rubric, write the one-sentence game, make the scope ladder, and create a bare project. By the end of the day, one input should move, select, or otherwise affect something on screen. Back up the project in a second location.
Day 2: make a rough playable loop
Add the obstacle or challenge and a temporary goal. Use plain text and shapes. Ask someone to try it for two minutes. If they cannot tell what to do, clarify the goal before adding content.
Day 3: complete the first version
Add a win condition, a loss condition where appropriate, and restart. This is the key checkpoint: you should now have a complete, if rough, game. If it is not playable, remove a mechanic or simplify the level until it is.
Day 4: add only essential content
Create the minimum level layout, dialogue, questions, or assets needed to communicate the concept. Reuse the same rules. A game with one well-tested level is stronger than three unfinished ones.
Day 5: test and fix blockers
Have two or three people play without you guiding them. Watch where they hesitate, get stuck, or misunderstand the goal. Fix crashes, unwinnable states, unclear instructions, and restart problems before visual refinements.
Day 6: package the submission
Export the build or prepare the required link. Write short controls and a brief explanation of your design choices. Test the submission on a clean browser, device, or account where possible. Make a backup copy with a clear filename.
Day 7: protect the buffer
Use the final day for retesting, recording a short demo if required, checking files, and submitting early. If everything works, add only low-risk polish. Do not start a new system on the last day.
Decide what to cut first
Cut features that multiply testing work. Multiple levels, branching quests, inventories, enemy varieties, custom save systems, procedural generation, and multiplayer create more combinations than they appear to. A simple rule is helpful: if a feature does not change the player’s core decision, it can probably be cut.
You can still make a project feel intentional with small, low-risk choices: a consistent two- or three-color palette, one readable font, a short sound effect, a clear objective, and a satisfying completion message. These improve communication without creating a large system to debug.
Be especially cautious with generated code or assets. They can speed up a draft, but you are still responsible for understanding, testing, attributing, and integrating what you submit. Use anything new in a small isolated test first. Never paste a large unknown system into your final build the night before submission.
Define “done” and test it like a teacher would
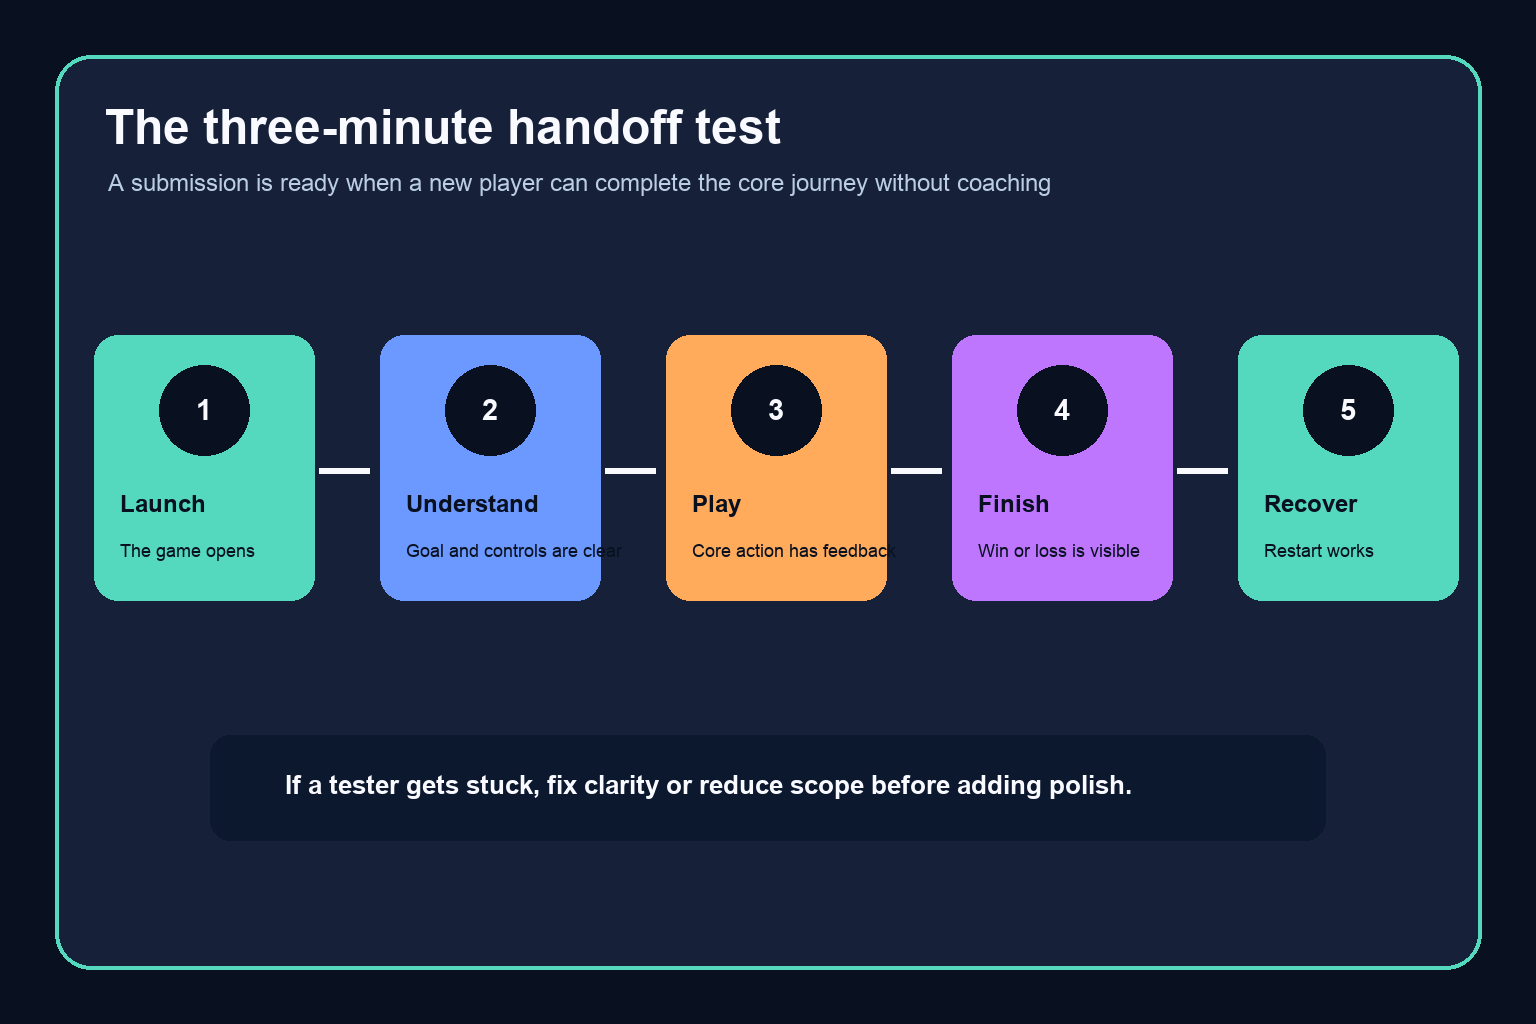
Make a submission checklist from the rubric. At minimum, confirm that the game launches, the controls are stated, the core loop can be completed, failure behaves sensibly, restart works, and the required files or link open for someone else. If your assignment asks for a reflection, note one design decision, one problem you found in testing, and one change you made because of that test.
A useful acceptance test is a three-minute handoff. Give the build and written controls to a classmate. They should be able to start, understand the objective, experience the central action, and either win or see a clear failure state without live coaching. If they cannot, revise the instructions, feedback, or scope.
What success looks like after one week
Success is not a feature-rich commercial game. It is a small, stable project that demonstrates a clear idea and respects the assignment requirements. A compact game with a readable objective, working input, one complete loop, sensible feedback, and a short reflection gives you something real to discuss and improve later.
When you finish early, make a copy before polishing. Then choose one improvement that reinforces the core loop rather than adding another system. That habit makes the project more reliable now and teaches the production discipline that helps on future game jams.
Frequently Asked Questions
Can I make a game in one week if I am a beginner?
Possibly, if you choose a very small format and a tool you can already run. Aim for one complete interaction loop, use placeholders, and reserve time for testing. A smaller finished project is the safer outcome than an ambitious first project with many incomplete systems.
What is the smallest game I can submit for a school project?
The smallest viable game has a clear objective, one player action, one challenge or decision, feedback, and an ending or restart. The exact minimum still depends on your rubric, so match the scope to the learning objectives your teacher set.
Should I make multiple levels?
Usually not at the start. Finish and test one level or scenario first. Add another only if the first build is stable and the rubric requires more content. Reusing one mechanic in a short, polished level is often more effective than several unfinished levels.
How much time should I spend on art?
Spend enough time for players to read the game state and objective, then stop. Consistent simple shapes, a restrained palette, and clear labels are usually better for a one-week project than custom assets that delay testing.
What should I do if I am behind on day three?
Remove a feature immediately. Keep the player action, goal, result, and restart; cut extras such as additional enemies, levels, story branches, collectibles, or visual effects. Re-test the smaller loop before adding anything back.
Should I use generated code or assets?
Use them only within your school rules and with careful review. Verify licenses and attribution, understand the code you integrate, and test it in a small copy of the project. Generated material is not a substitute for testing or for explaining your own design choices.